


You bought beautiful Christmas lights. You measured the roofline. You spent most of Saturday on a ladder, untangling strands that somehow became one enormous electrical knot.
Finally, you plug everything in.
You step into the street to admire your work.
And something feels… off.
One section sags. Another disappears around the corner. The spacing isn’t quite even. The roofline looks a little wavy. Somehow, the house doesn’t look nearly as impressive as those lights did in the box.
Here’s the frustrating part: the problem may not be the lights. It may be how they were installed.
The most common Christmas light hanging mistakes aren’t always dramatic. They’re small decisions; poor measurements, inconsistent spacing, weak attachment, bad power planning, or simply never looking at the display from the street.
And we’ve seen it many times.
The good news? Most of these problems are preventable.
Before getting into individual mistakes, stand where most people will see your house.
Usually that means:
Now ask:
| What You Notice | What May Have Gone Wrong |
|---|---|
| Roofline looks wavy | Inconsistent clips or spacing |
| One section looks brighter | Different bulb density or products |
| White colors do not match | Mixed color temperatures |
| Dark gaps appear | Poor measurement or failed section |
| Lights disappear from distance | Bulbs too small for the architecture |
| Shrubs overpower the house | Landscape lighting too dense |
| Wires dominate during daylight | Poor cord routing |
| Lights fail after rain | Outdoor electrical issue needs investigation |
| One section keeps falling | Incorrect attachment method |
| Display feels chaotic | Too many competing focal points |
The goal is not perfection from six inches away.
The goal is for the complete property to make visual sense from normal viewing distance.
Imagine standing across the street from your finished house.
The lights are bright, but one roof section sags slightly. Two bulbs are noticeably farther apart, and an extension cord crosses a section of trim. None of these problems looked serious while you were on the ladder.
From the street, however, they suddenly become part of the design.
Professional Christmas light decorating focuses on the entire property rather than treating every string as an isolated task.
That’s what creates the polished appearance people associate with professional holiday displays.
The first mistake often happens before anyone touches a ladder.
Starting with the most visible roofline may seem logical, but without a complete layout, you can quickly run short of lights, create awkward connection points, or overlook important architectural features.
A display without a plan can result in:
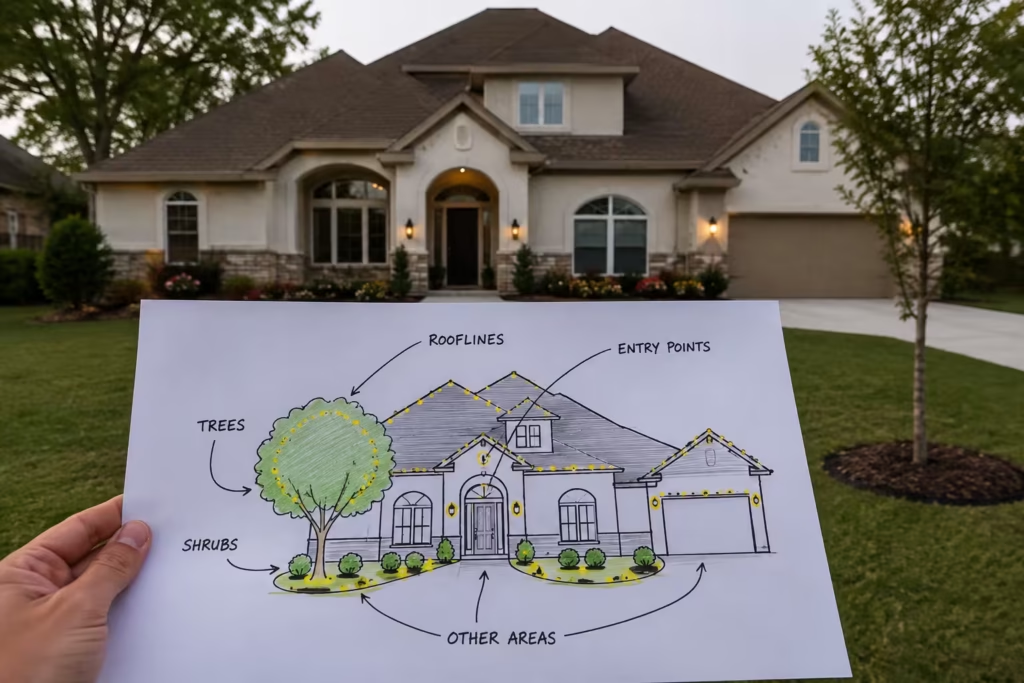
Before installation, map out the major rooflines, entry points, trees, shrubs, and other areas you want illuminated.
Practical takeaway: Design the display first. Hang the lights second.
A roofline can look simple from the ground while containing several different sections.
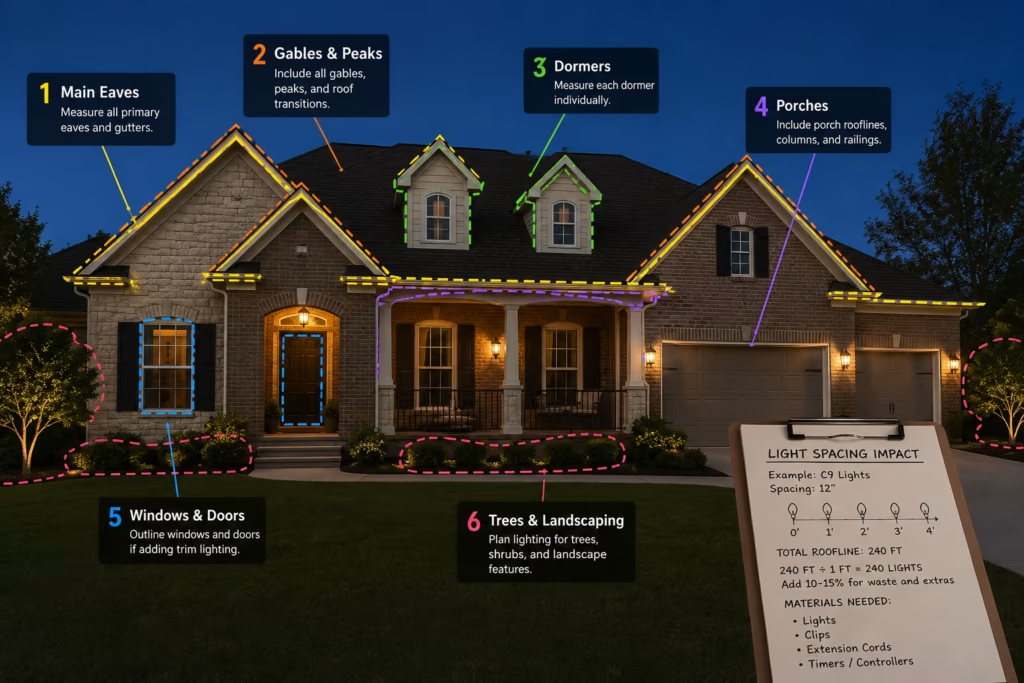
Gables, eaves, dormers, gutters, peaks, and separate roof sections all affect how much lighting you actually need.
Running short near the end creates an obvious stopping point. Buying substantially more than necessary can also leave you with excess material and awkward leftovers.
Professional decorators measure individual sections rather than relying on visual estimates.
Break the property into manageable sections:
Then account for how the selected light spacing affects the total amount of material required.
This is one of those mistakes you may not notice until the lights are glowing.
One section has tight, even spacing. The next has wider gaps. A third section sags between clips.
Suddenly, the roofline doesn’t look like one continuous design.
Consistent bulb spacing affects:
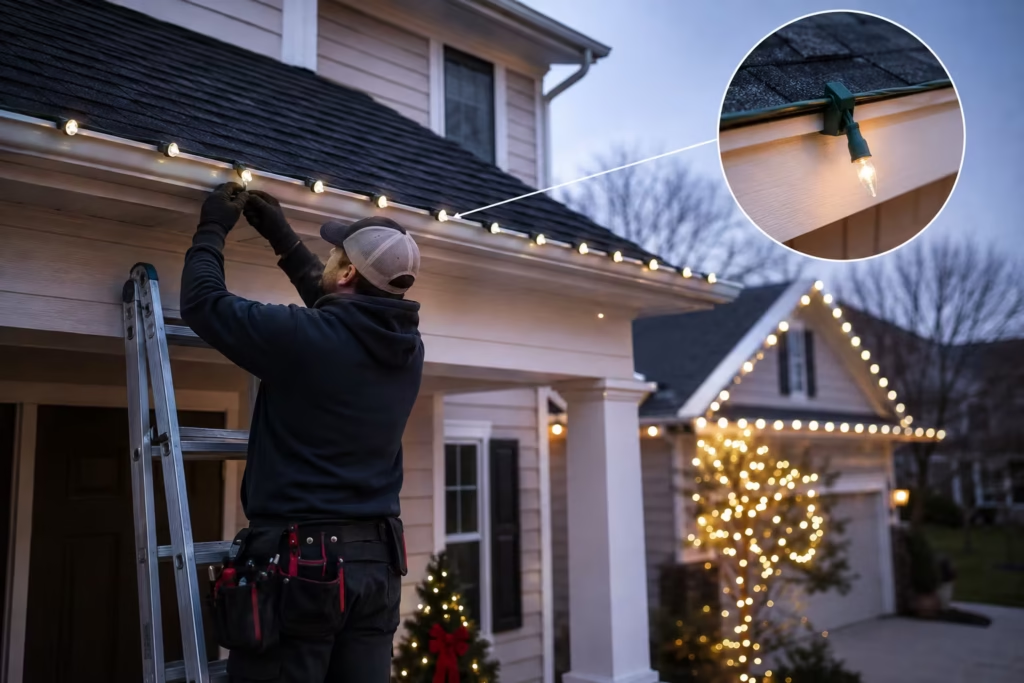
During Christmas light hanging, installers pay attention to clip placement and string tension so the spacing remains visually consistent.
Quick check: Stand several feet away before moving on. If the gaps look uneven from the ground, fix them before continuing.
Bigger bulbs aren’t automatically better.
C7 Christmas lights, C9 Christmas lights, and mini lights each create a different visual scale.
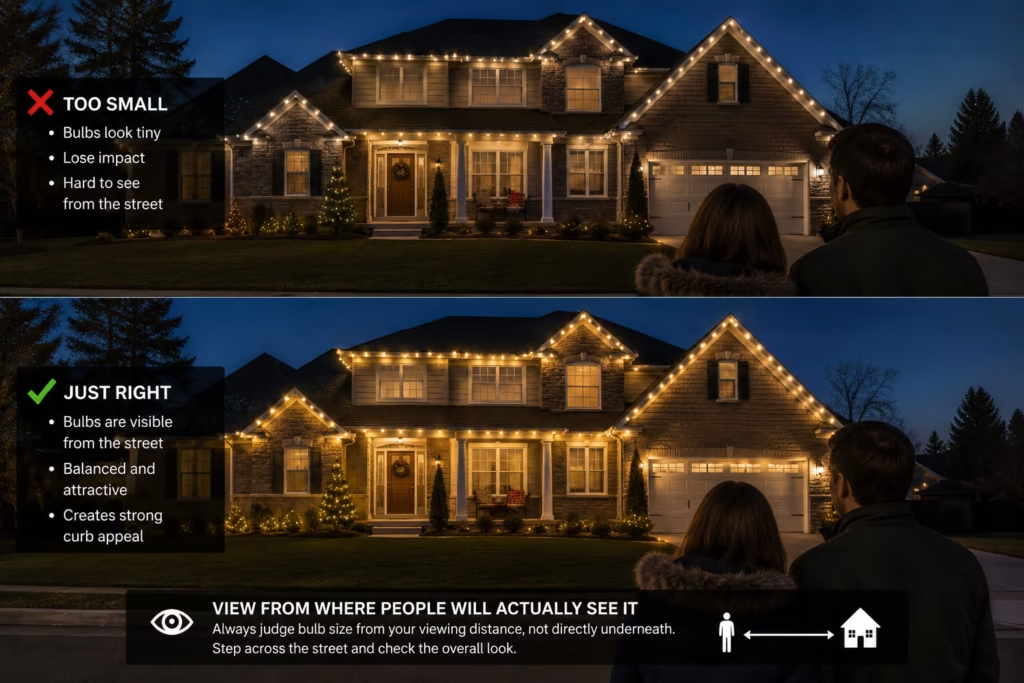
A large two-story home viewed from across the street may benefit from the stronger visual presence of C9 bulbs, while smaller architectural features can sometimes look more proportionate with C7 or mini lights.
The right bulb should complement the property rather than compete with it.
Professional tip: Judge bulb size from the location where people will actually view the display; not only while standing directly underneath it.
Warm white next to cool white can look intentional; or accidental.
The same applies when different bulb shapes, colors, or brightness levels are mixed without a clear reason.
Your eyes naturally notice differences in:
That can make an otherwise clean display feel disjointed.
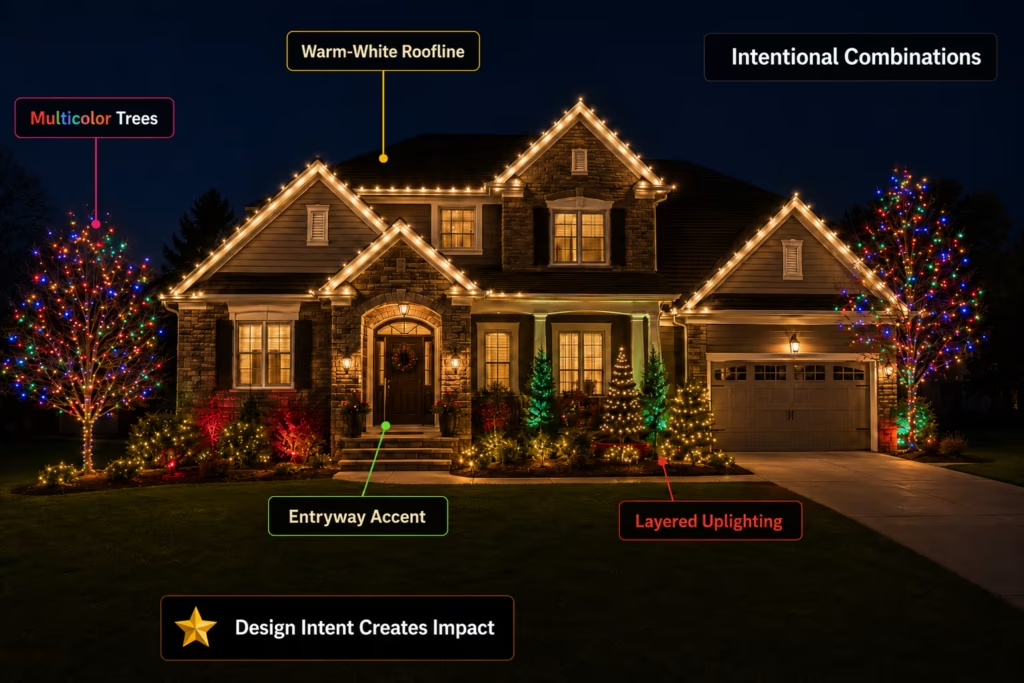
Intentional combinations can add depth.
For example, a consistent warm-white roofline could be paired with multicolor tree lighting or a different lighting treatment around an entryway.
Finding a failed light string on the ground is annoying.
Finding it after you’ve secured it across a roofline is much worse.
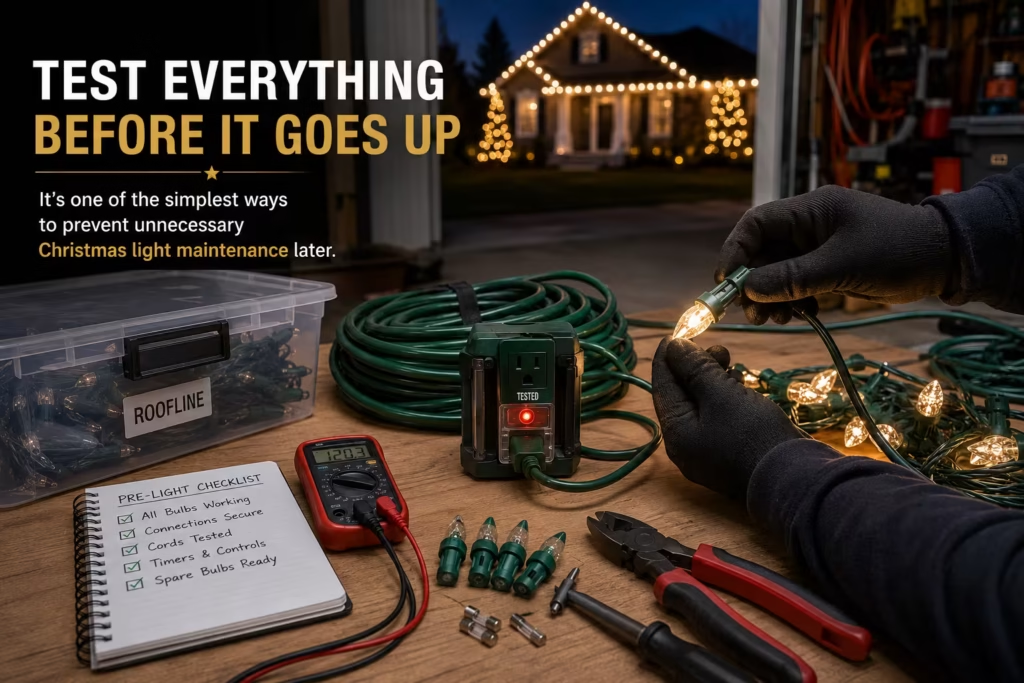
Before installation, inspect and test lighting according to the manufacturer’s instructions.
Look for:
Test everything before it goes up.
It is one of the simplest ways to prevent unnecessary Christmas light maintenance later.
A homeowner may spend hours perfecting the roofline and leave the rest of the property completely dark.
The result can feel top-heavy.
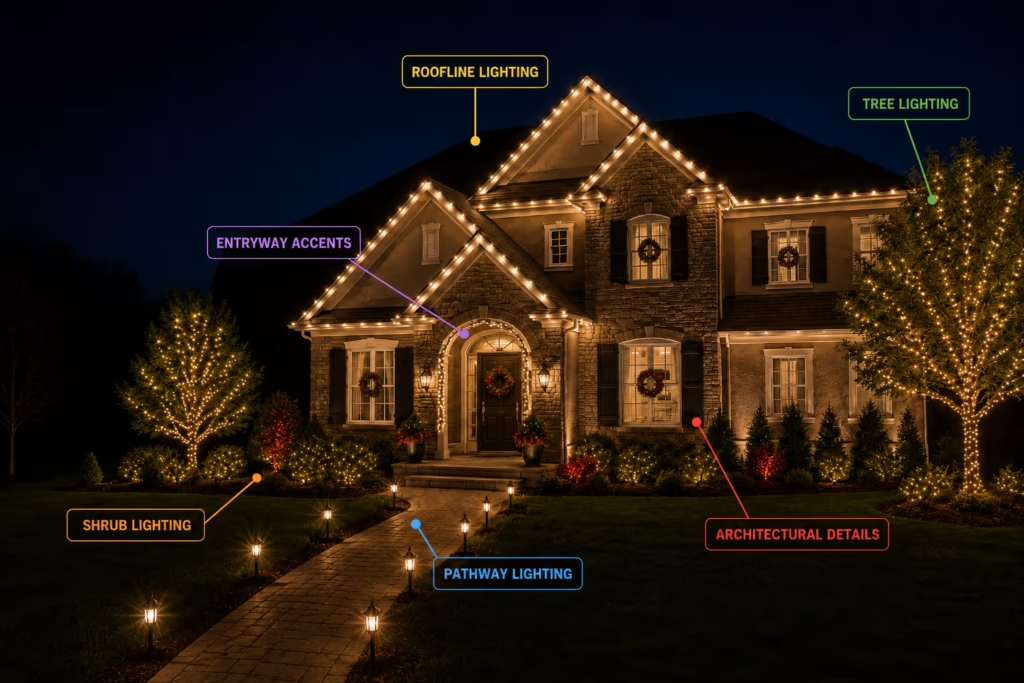
Trees, shrubs, pathways, columns, railings, windows, and entryways can all contribute to the overall composition.
You don’t need to illuminate everything.
The goal is to create balance between the house and its surroundings.
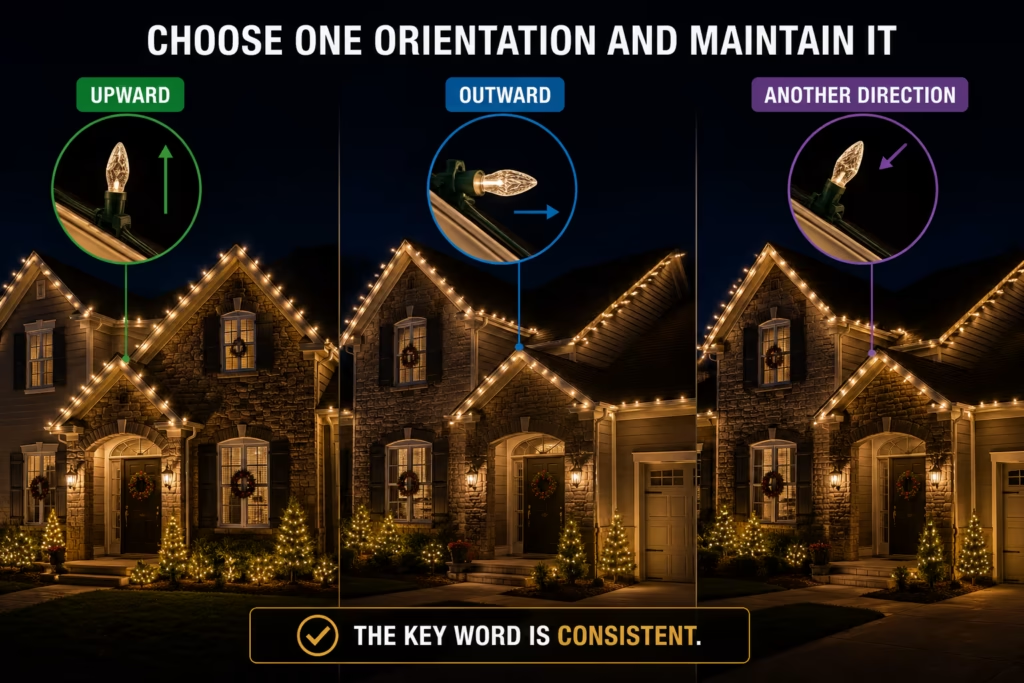
A roofline can have perfect spacing and still look messy if the bulbs point in random directions.
Imagine half your bulbs standing upright.
Others lean:
↗ ↑ ↘ ↑ ← ↗
From the ground, that creates an uneven outline.
Bulb direction affects:
For a clean roofline, choose one orientation and maintain it.
Depending on the clip system and design, that may mean bulbs consistently point:
The key word is consistent.
Pinterest doesn’t have your gutter.
Instagram doesn’t have the tree blocking the left side of your garage.
And the perfect holiday house you saved three months ago probably doesn’t share your roofline, landscaping, outlets, viewing distance, or architecture.
That’s why Christmas light decorating should be inspired by reference photos; not copied blindly.
Take the idea you like and translate it.
Maybe the inspiration home has five roof peaks.
You have two.
Don’t invent three more visual focal points simply to recreate the picture.
A good design works with architecture rather than fighting it.
Professional Christmas light installation becomes more practical as the project becomes larger, higher, or more detailed.
Consider it when:
Professional installation does not guarantee a perfect display.
It also does not replace a qualified electrician when the issue involves permanent household wiring.
What an experienced lighting crew can provide is a more systematic process for measurements, layout, access, mounting, testing, and visual consistency.

The best Christmas displays aren’t always the brightest. They’re the ones with intentional spacing, clean rooflines, balanced colors, and hidden cords. Simple homes can work well with DIY installation, while complex properties may benefit from professionals who understand proportion, access, and electrical planning. The goal is simple: every light should look like it belongs exactly where it was placed.
Share your thoughts below and let us know how we can help with your Christmas light installation project.
Get fast, reliable help with your Christmas light installation, featuring professional setup, secure installation, and expert support from start to finish.
